How To Test Agm Battery
Ronan Farrow
Apr 02, 2025 · 3 min read
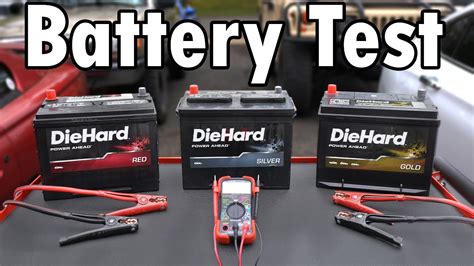
Table of Contents
- How To Test Agm Battery
- Table of Contents
- How to Test an AGM Battery: A Comprehensive Guide
- Visual Inspection: The First Line of Defense
- Using a Multimeter: Getting Accurate Readings
- Measuring the Open Circuit Voltage (OCV)
- Measuring the Internal Resistance
- Understanding the Results
- Beyond the Basics: Load Testing
- When to Replace Your AGM Battery
- Featured Posts
- Latest Posts
How to Test an AGM Battery: A Comprehensive Guide
An AGM (Absorbent Glass Mat) battery is a robust and reliable power source, commonly found in motorcycles, ATVs, RVs, and even some cars. Knowing how to test your AGM battery is crucial for maintaining its performance and preventing unexpected breakdowns. This guide will walk you through several methods, from simple visual inspections to using a multimeter for accurate readings.
Visual Inspection: The First Line of Defense
Before you grab any tools, start with a quick visual inspection. This simple step can often reveal obvious problems:
- Check for Physical Damage: Look for cracks, bulges, or any signs of leakage on the battery casing. A damaged battery casing can indicate internal damage and potential safety hazards.
- Inspect the Terminals: Examine the battery terminals for corrosion. Corrosion can impede the flow of electricity and reduce battery performance. Clean any corrosion with a wire brush and baking soda solution if necessary.
- Check the Battery Level: Some AGM batteries have a built-in indicator to show the charge level. This is a quick way to get a general idea of the battery's health.
Using a Multimeter: Getting Accurate Readings
A multimeter is the most reliable tool for testing an AGM battery's voltage and internal resistance. Here's how to use one:
Measuring the Open Circuit Voltage (OCV)
- Prepare your Multimeter: Set your multimeter to measure DC voltage (usually indicated by a symbol that looks like "—").
- Connect the Leads: Connect the red lead to the positive (+) terminal and the black lead to the negative (-) terminal of the battery. Ensure the battery is not connected to any load.
- Read the Voltage: The multimeter will display the battery's voltage. A fully charged AGM battery typically shows a voltage between 12.6 and 12.8 volts. A lower voltage suggests a lower state of charge.
Measuring the Internal Resistance
Measuring internal resistance provides a more in-depth assessment of the battery's health. Lower internal resistance indicates a healthier battery. This test requires a multimeter capable of measuring resistance.
- Prepare your Multimeter: Set your multimeter to measure resistance (usually denoted by Ω).
- Connect the Leads: Connect the leads to the positive (+) and negative (-) terminals, just as you did when measuring the OCV.
- Read the Resistance: The multimeter will display the internal resistance in ohms (Ω). Lower resistance values are better. The acceptable resistance value varies depending on the battery's capacity and type. Refer to the battery's specifications or consult a professional for guidance.
Understanding the Results
The results from your voltage and resistance tests will help you determine the health of your AGM battery:
- High Voltage (near 12.8V) and Low Internal Resistance: Indicates a healthy battery.
- Low Voltage (below 12.2V) and High Internal Resistance: Suggests a weak or damaged battery that likely needs replacement.
- Voltage within acceptable range but high internal resistance: This could indicate sulfation or other internal problems. Consider a load test for further evaluation.
Beyond the Basics: Load Testing
For a more comprehensive evaluation, especially if you have borderline readings from the voltage and resistance tests, consider a load test. This test simulates the battery's performance under load. Load testing often requires a specialized tool, a load tester.
When to Replace Your AGM Battery
If your tests consistently reveal low voltage, high internal resistance, or significant performance issues under load, it's time to replace your AGM battery. A failing battery can leave you stranded and potentially damage other components in your vehicle or equipment.
This comprehensive guide provides several methods for testing your AGM battery. By performing these tests regularly, you can ensure your battery remains in optimal condition, preventing unexpected disruptions and extending its lifespan. Remember to always prioritize safety when working with batteries and consult a professional if you have any doubts.
Featured Posts
Also read the following articles
| Article Title | Date |
|---|---|
| How To Remove Clear Coat Overspray | Apr 02, 2025 |
| How To Treat Rough Cut Lumber For Indoor Use | Apr 02, 2025 |
| How To Tighten A Emergency Brake Cable | Apr 02, 2025 |
| How To Style A Blue Dress | Apr 02, 2025 |
| How To Train Your Dragon Motorcycle Helmet | Apr 02, 2025 |
Latest Posts
-
How Many Oz In A Pork Chop
Apr 07, 2025
-
How Many Oysters In A Half Gallon
Apr 07, 2025
-
How Many Oysters Come In A Bushel
Apr 07, 2025
-
How Many Oysters Are In A Party Pack
Apr 07, 2025
-
How Many Ounces Is A Travel Size Perfume
Apr 07, 2025
Thank you for visiting our website which covers about How To Test Agm Battery . We hope the information provided has been useful to you. Feel free to contact us if you have any questions or need further assistance. See you next time and don't miss to bookmark.

